Archive | May, 2011

I’m definitely going back to FIT…after beach season.

27 May

After 5 weeks, I’m done with my class at FIT. I really really liked it, but I’m glad to have my Sundays back. Since this was a beginner’s class our project was pretty simple: pajama pants (using 1 yard of 1” non-fold elastic, thread and 3 yards of lightweight cotton).  I went with pink patterned poplin (alliteration!)– a really thin cotton, good for the summer:

Class 1: The basics – learn how to thread the machine and stitch.
I was stumped as to how we would fill 3 ½ hours with this, but the answer is simple: Industrial machines. Using an industrial sewing machine is like jumping into a Ferrari when you’re used to a Honda. They are so fast it’s ridiculous. None of us – who have all used sewing machines before – could sew a straight line by the end of the first class.

Class 2: Seams.
What I find amazing is how you can try something once and completely suck at it, but once you take a break, then come back to it, you can do it really well. That was the second class. The machines weren’t as intimidating and not only were we making straight lines, we were making professional seams:

French seam – These are used in really thin fabrics, like silk or chiffon, so that you cannot see any of the stitches, simply the folded edges of the seam.
Pink and Stitch – If you were to rip the lining on the inside of a dress jacket, this would be underneath.

Tailor’s Hem – If there were no lining in a jacket you would find a tailor’s hem, which is a neater version of the pink and stitch. I tried to find a picture of this but Google kept asking if I meant Tailor Ham. Google’s trying to be funny with the vegetarian.

Flat Felled– This hem is really durable and used mostly on jeans.

Overlock – Used for two reasons: 1) prevent fraying on the edges of woven materials and 2) give knit materials more stretch on the stitches.

Class 3: The pattern.
Our teacher provided us with patterns to trace onto paper, but the cool thing was we adjusted the patterns to our specific shapes. When I use commercial patterns I usually cut everything to a size 10, make the entire outfit, then take it in when I’m done. This time, I made the adjustments at the beginning. The three adjustments that I made to my pants were:

1) Drop the waist of the pants 1 ½” so that they were low rise and not “mom pants”
2) Measure my inseam and extended the length of the pant. I actually made them a little longer than my inseam because Laundromat dryers always make my pajama pants into crop pants
3) Widen the leg from about the knee to the ankle so that they weren’t tapered.

After making the patterns we cut out 2 leg pieces and ripped fabric for a drawstring. One of my favorite things I learned was that if you make a small clip at the edge of a single woven fabric and just rip, it will always tear in a straight line. SO much easier than trying to cut a straight line – a skill a 1st grade could annihilate me in.

Class 4: Begin sewing.
I think I sweat through this entire class. She warned us in the beginning that it was going to be 80% her demoing and 20% us actually getting to sew, but watching everyone trying desperately to catch up was comical. There was one class left after this to get everything done, but it still didn’t feel like enough time, so the basic atmosphere in the room was panic. At the end of 3 ½ hours all I accomplished was the outside seams. The other thing holding us up was that there was only one overlock machine so we had to wait on line to use it. The overlock machine (also called a serger) is awesome! It trims off the raw edges of the fabric and makes a really intricate stitch that reinforces the edges.

This also makes the inside of the pants look professional and finished. If you look on the inside of any of the things I’ve sewn so far, it is a labyrinth of random threads. This is much nicer.

Class 5: Final demos and finish garment.
This class was hysterical. The amount of random shit’s, fuck’s, and dammit’s being thrown around the room sounded like we were in a Tourette’s ward. The last two demos instructed how to finish the waistband with elastic and a drawstring by hand. My goal was to finish all of the sewing parts and then finish the waistband at home. Goal accomplished…just barely.

You know when you accidentally pull the string out of a hoodie and have to guide it back through? That’s how you put in elastic and the drawstring. She told us to put a safety pin at one end and use that to guide it through. It really helped; I’d recommend it for your next hoodie accident.

Here’s what about 11 hours of sewing gets you:

The next class I want to take is a hand sewing class focusing on tailoring (ex. fixing zippers, lengthen sleeves, shortening pants, etc.). They offer it on Sunday’s in June and July but I’m not willing to give up beach time, so I’ll be back at FIT in the fall.

If the rapture would have happened, we certainly wouldn’t have been saved

24 May

The wedding was on Saturday and at about 1am on Friday I was finishing the dress.  I already knew I wasn’t going to be wearing it, but it was the simply point of getting it done in time.

Something that confused me about this dress was the fact that it called for a zipper with stretch jersey material.  That makes no sense, stretch material obviously stretches and doesn’t need a zipper.  Therefore, I did not use a zipper.  This same thing happened with my anniversary dress, so now I have 2 zippers in stock should I need them for future pieces.  I’d like to have a nice little stash of fabrics and notions one day, but that would require an apartment with more than 1 closet.  To skip the zipper, I simply held it up on me, pinned where I needed to stitch and made a large seam down the entire back.

I finished off the bottom hem and it was done.


(I really need to figure out a better way to take pictures than in my mirror)

Nothing special, kind of bland, so I tried adding the chiffon back in.  I tied it around my waist but it didn’t stay up well, too slippery.

The back up dress was soooo much better.  Thank you Marshalls clearance rack!

I wore shorts underneath this short short dress for three reasons 1) I had every intention of getting drunk 2) I was ready to DANCE and 3) I ain’t no Lindsay Lohan showing off my coot.  Lucky for me, and everyone attending the wedding, the safety shorts were not needed.

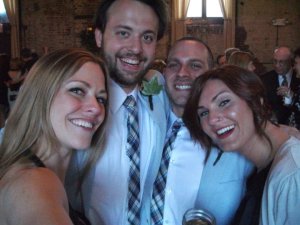
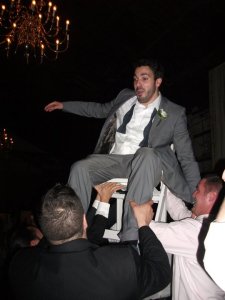
Sue and Degal had been dating, I believe, 9 years before getting married.  The world should have ended simply for irony purposes.  Good thing it didn’t because it was THE most fun wedding that ended with 3 guests bar tending, 1 shirtless groom, 90’s hip hop and a broken wrist.  If the rapture would have happened, we certainly wouldn’t have been saved.


Another bird cage veil!  Love them.


I hate my camera, its always blurry and pixelated during weddings. Grr.


The Green Building in Brooklyn.  SO awesome.


Lots of lifting happening at this wedding.


Chris taking over the bar tending duties.

At least I learned something…

19 May

I am about 3/4 of the way done with a dress for Suelynn and Degal’s wedding this weekend and honestly, I don’t think I’m going to wear it.  I’ll attempt to finish making it and maybe prove myself wrong, but let’s just say I’m glad I have a backup dress.

Here’s where the problem started, I was really into the polka dot blouse and worked right past when I said I would stop to give myself enough time to make the dress.  I originally planned a month for this dress, but left myself two weeks…two weeks minus 4 days for a business trip.

I had no plan in mind except to get an easy pattern that I could rush through. I found 3 that I really liked and 1 that was just ok.  Guess which was the only one available in my size? Yup, the just ok one.  So I went with it.

I kept coming across this bright blue color recently and had it in my mind to go with that. By the way, I hate the color blue. My last car was blue and I despised it until I happily totaled it in the beginning of the year. Regardless of knowing I hate blue, I got it anyway.

Then I had to find a contrasting chiffon for the top. I wanted a pattern, but they only had solids. I can’t wait until I’m local enough to shop in Manhattan and not limited to 2 stores. Blahhhhh….black chiffon.  I’m already not excited about this dress but I’ve got no time to be picky.

Plan for the night: cut out the patterns and material. Reality of the night: spend 20 mins trying to find the sizing chart, another 20 looking for the straight of grain marking, even more trying to decipher the hieroglyphics on the patterns and only ended up getting the patterns cut out. No fabric.  I have been reading patterns over a year now, I’m not that illiterate, but this was a new brand and by far the most confusing I’ve come across yet.  I’m pretty sure I won’t use Burda patterns again because I don’t have enough money to spend on therapy.  I should let the woman at Joanns know the sizing chart was on the actual pattern, not the envelope, since she couldn’t find it either.

Once I figured everything out, cutting the patterns and fabric was easy peasy, only 5 pieces!

Now on to sewing. The first step says to use a twin needle. A what? I went digging in my sewing box and miraculously found one. I watched some YouTube videos to find out how to thread it, got the tension right then moved to step 2….use a single needle.  Are you effing kidding me?!?  I read through the rest of the directions and found out the twin needle is only used on the last step and step one was just, i guess, letting me know to get ready for it. Gee, am I glad I wasted time setting that up….no, no, think positive…at least I learned something.

So the real first step is making the bodice.  I did a few seams and some stay stitching, then it instructed to sew in the elastic.  I know it did not mention elastic on the notions list, but just to be sure I went back and double checked.  Nope, not listed.  Thanks Burda.  Since I didn’t buy any, I had to use the elastic I got for my polka dot blouse 😦  I’ve never worked with elastic before so I think I did it right.  What’s the worst that could happen?  Oh yeah, wardrobe malfunction.  That’s one way to make an entrance to a wedding.

I still wasn’t fond of the black chiffon with a blue dress so I bought more chiffon in a light grey.  I spent a lot of time trying to pressing the seams in and tried sew the edges, but to no avail.  Since the fabric – which I’m pretty sure isn’t really chiffon – was so thin, the sewing machine kept pulling it into the bottom.  Not frustrating at all.  Reluctantly, I went back to the black chiffon, ruched both pieces and sewed the bodice to the skirt, which is where I am today.

Personally I think the amount of chiffon is waaaay too bulky and I don’t like it so far.  I was planning on removing that part and just making it a plain blue dress, but I have plans both nights before the wedding, soooooo….I think I may just finish this some other time and keep it for another night.  Oh, did I mention I have another wedding in June that I want to make a dress for?  This time I’ll give myself the full month to work and hope it turns out better.

My new obession: The hallways of FIT.

10 May

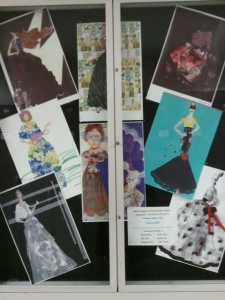
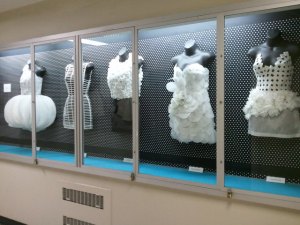
For the past few weeks I have been taking a sewing class at FIT in Manhattan and it’s the best.  So so so so fun!!  What’s even cooler than the class are the hallways in the apparel design building.  They are filled with displays of students projects, collages of famous designers, ideas from start to finish and I’m sure much much more, but I’ve only made it through floors 7 and 8 so far.   Enjoy the pictures:

If anyone would like to support me financially for the next 4 years, I’d love to quit my job and go back to school full time for this 🙂

Who is Carla Bruni?

6 May

Who is Carla Bruni? According to her Wikipedia page “Carla Bruni-Sarkozy (born Carla Gilberta Bruni Tedeschi, 23 December 1967) is an Italo-French songwriter, singer, former model and current First lady of France.”  Here’s my definition: Absolutely stunning.  Love her style.  I have a picture of the first lady up on my inspiration board in a beautiful, sophisticated, yet super cute polka dotted dress shirt. This wasn’t as much an inspiration for part of something as much as it was an “I want that but it probably costs a thousand dollars so I’ll make it myself” inspiration.

I found the perfect pattern right away. Vogue again. As much as I find their patterns hard sometimes, they really do have the best styles.  The pink post-it is something I do with each project.  I write down the settings on my sewing machine for the stitch and the basting.  Since you switch between 2 or more stitch sizes throughout a pattern its easy to lose track or what setting you were at.

I actually have about 5 pages of polka dot clothes ripped out of magazines.  I  just keep going back to them.  They remind me a lot of rockabilly fashion which is one of my favorite things.  It took me a few stores to actually find a black and white polka dot shirt with the right size dots but Huntington Fabric Depot came through in the clutch.

I was so excited to start this shirt. Since the pants didn’t become a staple of my wardrobe I’m determined to make this shirt a wearable work piece.  I got home and started right away.  By the way, did you know that the term “Polka Dot” came about because this dot style was the in-trend fashion at the time the Polka dance was becoming popular?  Makes sense.

This time I paid very close attention to which side of the fabric I should be cutting on so I didn’t run into trouble at the end again.  After I cut out the pieces I like to pin the pattern to each piece so I know what is what. Some sections have a tendency to look similar but they’re just slightly different and you need to reference back to pattern cut outs for things like fold lines, dart markings, gatherings, etc.

The fabric was a little slippery to cut but sews really nicely.  After a little over a year of sewing things are becoming more understandable.  I’m able to breeze through the first few steps of stay stitching and attaching the front to the back.  See how pieces 2 and 3 bend, but 4 and 1 are more straight?  Well, when you line them up and sew them together that curve makes the arm hole.  Pretty interesting, right?

There are a few things on this shirt I have not done before: a collar, elastic, and a row of buttons.  First new step up was the collar.  One side of it was reinforced by fusible interfacing to add that nice stiffness and shape to it.  Piece number 5, the perfectly straight rectangle, was being attached to the completely curved neck.  Hmmm….how is this going to work?  A lot of times when you’re attaching a curved piece they ask you to clip the edges.  This just means making a little triangle cut down to the stitch to help the fabric bend with the curve.  Once I got everything pinned, I went REALLY slow to avoid catching any fabric in the stitch that shouldn’t be stitched.  This happens a lot when you get closer to finishing a piece.   The more layers of fabric you have, the more likely you are to catch a sleeve or a collar in a stitch that’s for something else.  Patience and a slow speed are key here.  Collar done!

Next step was attaching an inside piece to the front panels.  This is to create a nice smooth look to the edges where the buttons will end up, and create that second triangle bend you see near the collar of dress shirts.  Again, I just lined everything up and went really slow.  The left side went great!  I only caught some extra fabric slightly in one spot but was able to rip that and fix it easily.  The right side didn’t go so well.  I think I got a little overconfident and rushed, catching the fabric a bunch of times.  I ended up getting it all worked out, just took a lot longer than expected.  So here’s where I’m at today:

I put this shirt on hold for a little bit to work on a dress for a friends wedding.  Only problem is the wedding is in two weeks and I’m going to be in California for work 4 of those days.  Less than 2 weeks to make a dress, this could be a very bad idea…

Exciting News :)

4 May

The lovely Jenni, at I Spy DIY –  a SUPER cute Do-it-yourself blog – put up a post about the pillows I made for Chris!  How exciting to wake up to that?  I was wondering how I got so many hits over night.  Be sure to check out her blog for some really cute ideas on how to make accessories, clothes, shoes and more on the cheap.  I promise you’ll love it 🙂

http://ispy-diy.blogspot.com/

The best Catwoman is Michelle Pfeiffer.

3 May

October 31, 2010

Good news, this is the last possible “past” project I can write about and then I’m up to current projects!  whoo hoo.  Its more of a DIY costume project, but there is some sewing included so it counts 🙂

I LOVE Halloween…really really love it!  August is usually when I start planning my costume.  I spend a lot of time in those pop-up Halloween stores and shopping online to make an awesome costume!  Axl Rose, Amy Winehouse (before there was a pre-made costume) Sarah Palin (see Amy Winehouse parenthesis) and this year….CATWOMAN!   Meeeeooooowwwww!

I do not like the costume in a bag versions of Catwoman, they do no justice to the fantastic-ness that is Michelle Pfeiffer

Let’s not even talk about the Halle Berry version, blasphemy.  So where’s the first place you go when you need a vinyl bodysuit? Church craft fair?  Nope.  Xpresions!  Porn shop to the suburbs.  Low and behold they had a shiny, long sleeved cat suit.

Only problem is there wasn’t really a back to it….at all.  It was open all the way down to about a quarter inch above inappropriate-ville.  I could wear it, but sitting down or bending over or any other quick movement would be out of the question for the night.  Not a problem with my handy dandy sewing machine!

I had some black super stretchy knit fabric left over from my anniversary dress that would work perfect for making a back.  I needed something really stretchy because the suit was tight and I would not have been able to get it on with a woven fabric on the back. I put the fabric inside of the body suit and just traced out the opening right onto it with a marker.  I cut about a little more that an inch outside the line to give myself some seam allowance.  I did a straight top stitch right along the opening to attach the two pieces together.

Now I had a sweet, more appropriate body suit, but it still needed something.  Stitches.  The perfect solution came from my desk at work – white out!  I tried my best to follow the pattern from the Michelle Pfeiffer costume – not that anyone would notice if I did or didn’t, but I put wayyy too much effort into my costumes.  For example, both my Amy Winehouse  and Axl Rose costumes had exact replica’s of their tattoos that I photoshopped and printed onto fake tattoo paper.  The extra effort is always worth it.

I completed the look with a Catwoman mask I got from Amazon.com, caked on makeup, high boots and fake nails which made it hard to do anything all night…yet they stayed on during cartwheels in pretend superhero fights.  Go figure.

Lazy curtains

1 May

January 25, 2011 (whoops! Almost forgot these)

I have wanted to make curtains for my kitchen since I started sewing, but it took me a long time to find the right fabric.  I love bright orange, as you can probably tell from the Hawaii dress, and have a few things in my kitchen in the same shade: a painting from Cass and my super awesome Rachael Ray frying pans!  When I came across a Sari fabric in the same color I knew I had to get it! At $15 a yard I planned on waiting until I had some extra cash. In reality, I bought the fabric around Christmas when I always get disgruntled that I’m going broke on other people and splurge on myself. Logic is not my strong point.

The fabric is see through which I like since it lets some sun in and avoids turning my room into a cave.  It also has a pretty pretty gold flower pattern around the bottom.

I bought about about 1 1/2  – 2 yards of fabric so that it was twice the size of my window and would bunch nicely.  I cut it straight down the middle to make two even pieces- left side, right side.  With the fabric on my table, I placed the curtain rods I was using at the top and folded the fabric over so that it created a hole wide enough for the rod to get through.  I pinned it in place and made a straight stitch, about 1/4″ from the edge so that it wasn’t so obvious in the thin fabric, from one side to the other.  Repeat on side two.

The bottom part with the flower pattern was actually the selvages, which usually get cut off, but i left them as is because i didn’t want to make a seam over the flowers.  FYI selvages are, to quote my google definition search, “an edge produced on woven fabric during manufacture that prevents it from unraveling.”  I had all intentions of making small seams on the sides of the curtains to neaten things up, but it was a pain to pin the slippery fabric.  I got lazy and skipped doing that since I live alone and no one would notice but me. I should fix this one day because it does look sloppy, but I think there’s a better chance Trump will become president before I sew those hems.  See, sloppy strings:

It may not be the color for everyone, but love the way these look in my kitchen.  Although I think anything would look good on a window with a view to the water 🙂